Cascading Style Sheets (CSS) is an HTML standard that Web site developers use to control over how pages are displayed. With CSS, designers and users can create style sheets that define how different elements, such as headers and links, appear.
If you are already familiar with CSS, here’s a way to quickly make test changes on your blog’s design:
1. Download and install the Mozilla Browser.
2. Download in install the Firebug plugin. This plugin will allow you to edit, debug, and monitor CSS, HTML, and JavaScript live in any web page.
3. Open your blog in Mozilla. Click on the Firebug icon at the lower right corner of Mozilla. A small tab should appear.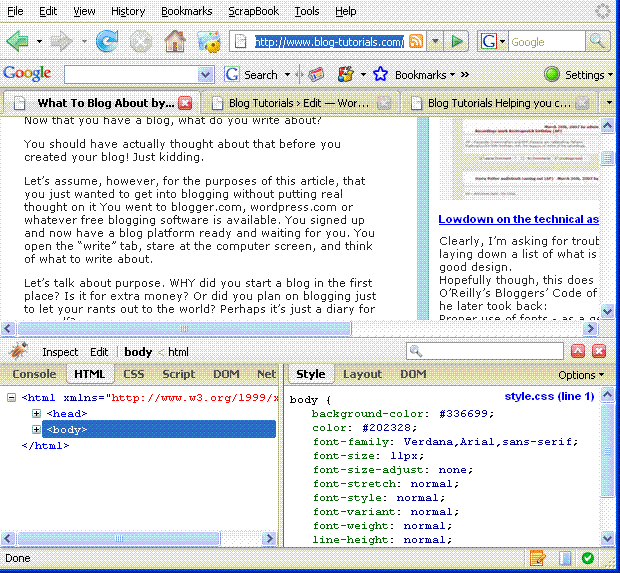
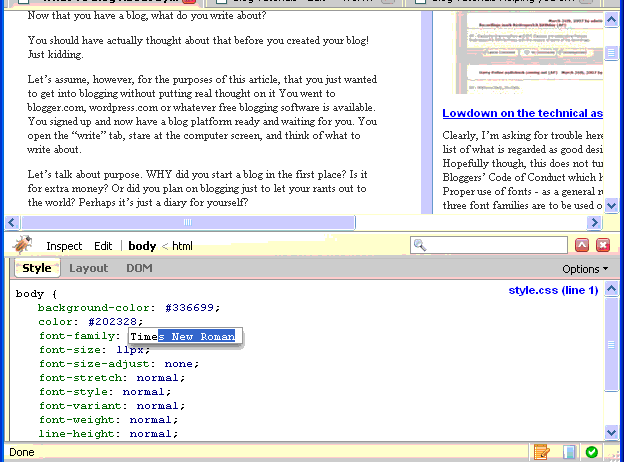
4. Inspect the various elements in your blog. Edit the CSS files and see how the changes are immediately shown.For instance, look at the body CSS settings and try to change the general fonts used.
5. Once you you are satisfied with the new blog look, Copy your CSS changes and replace the CSS file on your blog’s server.
I often make design changes in my blog and follow this procedure myself.
Originally posted on May 31, 2007 @ 2:43 pm